How to Make DIY Christmas Ornaments from Air-Dry Clay Using Cookie Cutters🎄
- Dec 21, 2025
- 2 min read
Looking for a creative Christmas craft idea that goes beyond baking? Cookie cutters aren’t just for cookies. They can also be used to make adorable Christmas ornaments from air-dry clay. Perfect for decorating your tree or gifting to family and friends. Video in the end 🫶
These ornaments turn out lightweight, cozy, and slightly imperfect in the best handmade way ✨ No oven, no special tools, and no experience required.

Why Air-Dry Clay Is Perfect for Christmas Ornaments
Air-dry clay is one of the easiest materials to work with, especially if you want something simple and mess-free. I used white air-dry clay because I’m a beginner and find it easier to work with than terracotta air-dry clay.
No oven or baking required
Easy to work with
Lightweight and safe for Christmas trees
Perfect for crafting with kids or as a cozy winter activity
Perfect for handmade Christmas gifts
What You’ll Need:
Air-dry clay (any brand works)
Cookie cutters (I used Gingerbread Man & Santa, but any design works)
Rolling pin or glass bottle
Straw or wooden skewer (for hanging holes)
Parchment paper or silicone mat
Acrylic paints or markers (optional)
Twine, ribbon, or string
Optional extras:
Fine brush for details
Clear varnish or sealer for protection
Step 1: Roll Out the Clay
Place your air-dry clay on parchment paper and roll it out to about ¼ inch thick. Keeping the clay evenly rolled helps prevent warping while drying.
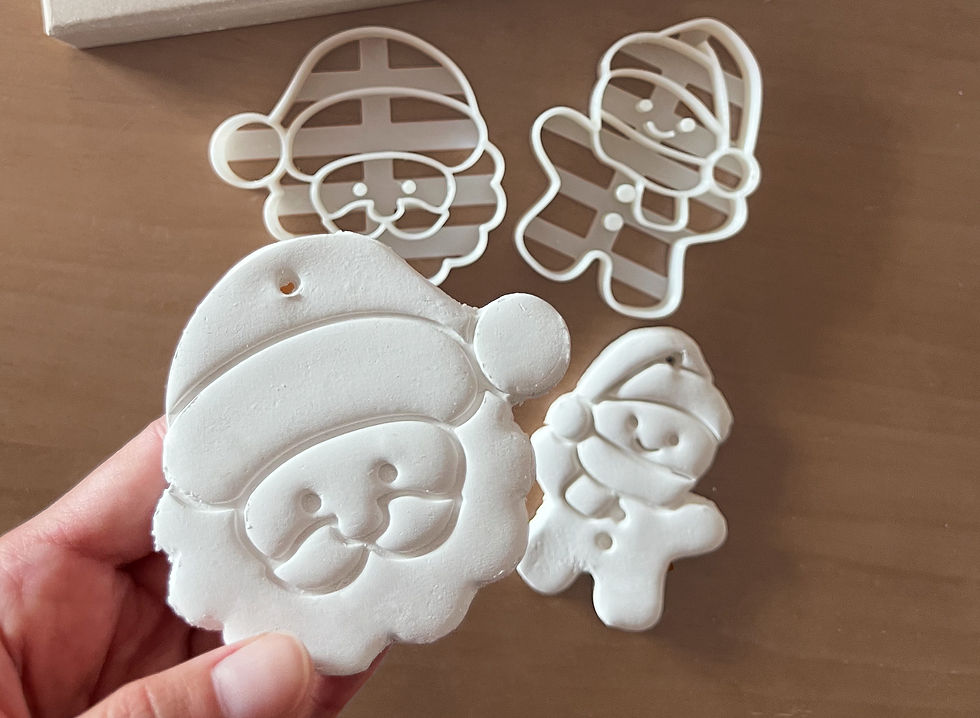
Step 2: Cut Out Your Christmas Shapes
Press your cookie cutters firmly into the clay, just like cutting cookie dough. Unlike dough, clay can be slightly stickier. If it gets stuck in the cutter, use a knife or spatula to carefully help release it.
I used my Gingerbread Man and Santa designs because classics never fails 😊🙌
Step 3: Make a Hole for Hanging
Before the clay dries, use a straw or skewer to make a hole at the top of each ornament.
Don’t place the hole too close to the edge. Leaving a little space helps prevent cracks once the ornament is dry.
Step 4: Let the Clay Ornaments Dry
Allow the ornaments to air-dry completely on a flat surface. Drying usually takes 24–48 hours, depending on thickness and room humidity.
Flip them once after several hours so both sides dry evenly.
Step 5: Paint and Decorate Your Ornaments
Once fully dry, you can leave your ornaments natural or decorate them.

Step 6: Seal and Hang Your Christmas Ornaments
For extra durability, apply a thin coat of clear varnish or sealer. Once dry, add ribbon or twine your ornaments are ready to hang on the Christmas tree.

You can also create your own one-of-a-kind cookie cutter design to make truly unique ornaments that no one else will have.
They’re perfect as gifts, for craft fairs or markets, or even as the first step toward starting your own small business.


Comments